Hello and welcome to this week's Treasure Cruisin'! This time, I decided to tread into Legacy and tech one of my favorite decks in the format: Manaless Dredge. Before I get started, I need to clarify a few things. First, this is Legacy. The decks in this format play some of the most powerful cards in the game, and many of them are on the Reserved List. Consequently, the format is very expensive to buy into. When we discuss budget Legacy, we are not talking about USD$50 or $100—we need to be in the $200 to $300 range. Why? Because decks in the lower price calibers usually cannot compete against decks such as Grixis Delver, Czech Pile, or the myriad of other top-tier strategies. However, if we push our budget to make space for more expensive cards, we also get access to powerful cards. Legacy is naturally more powerful—and more broken—than Modern, and thus we need to have the most powerful cards possible in our deck in order to compete, even if it means pushing the bounds of the budget. In a format where decks cost as much as $2,000, $200 to $500 is not terrible. Manaless Dredge falls othe lesser end of this range, sitting at $240—less than the price of a Volcanic Island—and with a TCGPlayer optimized cart it can be had for under $180. Without further ado, here is Manaless Dredge!
Manaless Dredge is one of the strangest decks in Legacy, and arguably in all of Magic: The Gathering. As the name entails, we play zero mana sources in our 75. We eschew the most basic resource in the game to take full advantage of our graveyard. Despite its cost, Manaless Dredge is very difficult to play correctly due to the sheer number of triggers and interactions to keep track of, and I recommend goldfishing the deck numerous times or playing on Magic: The Gathering Online before taking it to a tournament. We usually win with creature beatdown, but we also pack a game-ending combo to take down an unsuspecting opponent by surprise. You may be wondering, "How do you even get to that point in the game? You can't cast spells!" I will explain all of this, and the inherent intricacies of this deck, as I breakdown the individual card packages.
Dredgers
Being that this is a Dredge deck, we will first investigate the namesake mechanic that fuels our engine. We play fourteen creatures with dredge, and while they all have stats, the only number we care about is the dredge number itself. In every opening hand, we need to have a card with dredge, and if we do not, hope to find one fast because we can never mulligan. This brings me to one of the many quirks about this deck. Because we have no mana, we cannot cast any of the usual suspects for putting cards in the graveyard like Faithless Looting or Careful Study. Instead, we take advantage of the maximum hand size rule. This means that we want to be on the draw no matter what deck we find ourselves up against. If we go first, we essentially give our opponent a free Time Walk. In a similar vein, mulliganing means we cannot pitch a card on our first turn, creating the same effect. We have enough graveyard effects that even if we do not have a dredger in hand, it is better to keep the hand anyway and start putting other cards into the bin.
This card is about as gross to play against as it looks.
Obviously, cards with a higher dredge count are better, which makes Golgari Grave-Troll far better than Shambling Shell. The best card to pitch on turn one, however, is Phantasmagorian. Being able to discard three cards on turn one is incredibly powerful in a deck that uses the graveyard as a resource. As if this was not powerful enough, we can activate Phantasmagorian's graveyard-based ability twice by activating once, holding priority, and activating again. While we can only return it to our hand once, making the second trigger fizzle, discarding three cards is the cost of the ability, which makes it impossible to respond to. Stifle and other cards that counter activated abilities do not prevent us from discarding almost our entire hand. Phantasmagorian is also very useful for putting our dredgers back into our graveyard from our hand after they dredge, continuing our self-mill engine. It is the most powerful play in our deck because it acts like a Fastbond for putting cards into the graveyard, and while it does not win the game by itself, and puts us farther ahead in our gameplan than our opponent is likely to be at on turn one.
Threats
Now that we know how we put cards into our graveyard, we need to discuss what the payoff for milling ourselves to pieces is. We run a whopping sixteen creatures that can put themselves into play from the graveyard. Having a critical density of these creatures is important because of every Dredge deck's inherent weakness—variance. We cannot control the position of every card in our deck, and this causes us to whiff on dredges where we hit only utility spells but no action. Manaless Dredge seeks to decrease this variance by dedicating every card to either being profitable in the graveyard or making us dredge as much as possible, and our threat package illustrates this perfectly.
Seriously this card probably has the strangest rules text to ever see print
We will start with the most complex of these creatures: Nether Shadow. At first glance, this seems like a lot of work for a 1/1 with haste. Upon further examination, this is easier to achieve thanks to how dredge works. Yet another quirk of the mechanic is that, while all of the cards are revealed at the same time, we choose what order those cards enter the graveyard in. For example, if we dredge Stinkweed Imp, and we reveal a two creatures, Nether Shadow, and two more creatures, we can put Shadow into the bin first, and than put the other four creatures on top of it, thus stacking our yard for the trigger. A hasty 1/1 is not exactly impressive, but it is a creature that gives us recursion. As we will see, we want as many threats as possible. Even if its body is not relevant, we have plenty of ways to sacrifice it for value. Plus, there is something rather thrilling about playing the little ghost that could all the way from Alpha. The massive amount of triggers in this deck can make it easy to miss Nether Shadow's trigger. In situations like this I recommend getting a specific printing of certain cards to help make them more visible in your deck. For Nether Shadow, most printings are white border, and this is wonderful because it makes them easy to spot in the graveyard, so all we have to look for in our upkeep is the white border to let us know we have a Shadow.
Our second creature with haste is Ichorid. Exiling a black creature from our graveyard is not a problem in our deck. As long as we continue dredging, we will have creatures to feed our Ichorids. Generally speaking, we can exile our excess dredgers and utility cards such as Street Wraith with little to no downside, and in a pinch the less efficient Nether Shadow. While we do need extra creatures to fuel Ichorid, its self-sacrifice trigger actually synergizes with Bridge From Below. A three-power beater is also a very effective clock in Legacy, and in multiples it quickly provides enormous advantage. When acquiring copies, I recommend Eternal Masters foils or the original printing from Torment. The foils are distinct and should be easy to find in your graveyard while also only adding few dollars to the deck's cost. The original print has a small tombstone in the upper lefthand corner, which is also easy to find.
Our next two playsets are creatures that we do not have pay a cost for, but rather come into play by just playing the deck. Narcomoeba only needs to be milled to come into play, which gives us a free creature. A free creature us never bad, even when it is a simple 1/1 flier. Even if the body seems underwhelming, it is free sacrifice fodder for Cabal Therapy. Notably, Narcomoeba does not come directly into play from the library; it still enters the graveyard first. This gives our opponent a chance to act before it enters play, and a Tormod's Crypt cracked in response to the trigger does neuter our jellyfish. I would nab the Future Sight printing to make them easier to spot while dredging. Besides assisting us in our beatdown strategy, Narcomoeba is an important element to our combo kill. We will reach that in a bit, but we have a few more cards to talk about first.
Our next card is a recent gift to Dredge players in all formats: Prized Amalgam. Getting a 3/3 for simply putting a creature into play presents a fast clock, especially in Legacy where small creatures reign supreme. If this was not reason enough to play Amalgam, we can resurrect it after it dies thanks to Ichorid and Nether Shadow, two threats that return to the battlefield by themselves! Prized Amalgam gives us a resilient threat, something that keeps coming back to wreck havoc on our opponent's life total. For specific printings, it only has one, but it is also one of the few multicolor cards in this deck. Search your graveyard for multicolored cards whenever you return a creature to play. It is also critical to understand that this card has two triggers—one when a creature comes into play from the graveyard, and a second on the end step. It is essential to understand how triggers work in any Dredge deck, and I want to further reinforce that MTGO is an excellent tool for learning how to play Dredge because it performs all the triggers for you, guaranteeing that they will not be missed.
While not a threat by itself, once our next card gets going it creates an insurmountable horde of zombies. Bridge from Below is one of the scariest cards to have in our graveyard. Whenever one of our nontoken creatures dies, we replace it with a 2/2 Zombie token. With a single Bridge in our graveyard, we can go toe-to-toe with many grindy decks. Once we get multiples, however, it starts getting out of hand. Letting an Ichorid sacrifice itself and than putting three Zombies into play is one of the most amazing feelings in Magic. However, we sometimes have to be careful about how we attack. All it takes is one of our opponent's creatures dying to exile all of our Bridges from our graveyard. This clause leads to some hilarious situations, such as our opponent Abrupt Decaying their own Baleful Strix! To make them stick out from your graveyard, [i]Future Sight[/i] copies of Bridge from Below have the set's special border. Whenever a nontoken creature goes to the graveyard from play, check for Bridge from Below in the graveyard.
Utility Cards
To keep our engine running smoothly, we run a few utility cards that serve various purposes. Keep in mind that these are typically only useful when they are in our opening hand. If they are not there, do not plan on them being very relevant in the match. Again, we almost never mulligan, so these cards fill roles that are great to have, but not a necessity.
We have eight cyclers—four Gitaxian Probe and four Street Wraith. Both of these are used to generate extra dredges in a single turn, or they dig through our deck to find our first dredger. Each of these cards, while accomplishing the same goal, also have key differences that let them fill other roles. Street Wraith is a black creature that we can feed to Ichorid, and we can cycle it to stack another creature on top of Nether Shadow. Additionally, we can cycle at instant speed; this can be abused in response to targeted graveyard hate like Deathrite Shaman and Faerie Macabre. In contrast, Gitaxian Probe is sorcery, so we cannot use it to save a dredger at a moment's notice. Additionally, we actually cast Probe—our opponent can counter it, cutting us off from another Dredge. On the upside, Probe does more than just dumping cards in the bin. Seeing our opponent's hand gives us extra information for planning our turns ahead. It also synergizes with Cabal Therapy, our only form of interaction in the maindeck.
You say torture, we say therapy.
Speaking of Therapy, we run a playset. Sacrificing a creature is easily accomplished in our deck, and allows us to get some value from Ichorid in the post-combat main phase. Usually, we expend our Therapy on cards we simply cannot beat. These are typically hate cards or creatures too large for us to handle. Keep in mind that while most Therapy decks get two shots per copy, we cannot cast it outside of flashback. This means we only get one cast per copy. We typically are not concerned with cards such as Brainstorm or other cantrips. Most removal spells will be cast in response to Therapy, and we can try to hit cards like Force of Will or Daze if we need to. Another layer to Cabal Therapy is that we do not name the card until it resolves. If our opponent asks us what we are naming, that means it resolved; they cannot respond to it if they asked the question. We do have to give our opponent a chance to respond, and we cannot name a card on cast to prevent a response. They are entitled to priority, so do not be afraid to slow it down if you must.
To aid our disruption package, we run a trio of Chancellor of the Annex. As long as we have one in our opening seven, we force our opponent to play off-curve for the first turn or give us a free counterspell. This is excellent against glass cannon combo decks like Oops, All Spells and One-Land Belcher. Additionally, it throws off early graveyard hate in post-sideboard games. It is possible to go up to four copies, but it requires cutting another utility card to make space. While we do not need this card in hand to play the deck, the chance of having free disruption is too good to pass up.
Our last utility card is a singleton Ashen Rider. We can Dread Return it into play if we need to remove troublesome permanent, such as Jace, the Mind Sculptor. It is also excellent against Show and Tell and Reanimator decks with Exhume because we get to exile whatever they put in to play. A 5/5 flier is also nothing to scoff at, and any opponent who wants to remove it will pay dearly. It is just another fantastic card to play in case we come across troublesome cards, and shores up our lack of interaction.
The Combo
Our last cards are for a combo that can win the game out of no where. There is some variance among decklists as to how many copies of each combo piece to play. This list is lighter on said pieces, but you could easily include more if you so choose.
HEY YOU GUYS!
In order to set up the kill, we need two cards in our deck—the aforementioned Dread Return and Balustrade Spy. Dread Return is pretty self-explanatory; we can sacrifice three creatures with no issue, and we may even get a few zombies from Bridge from Below in the process. What we should really focus on is Balustrade Spy. The milling ability is irrelevant to our opponent. After all, what is milling a few of their cards going to do? Well, we are not exactly targeting our opponent. When we Dread Return a Balustrade Spy, we target ourselves with the mill trigger. Because we do not run any lands, we flip our entire library into our graveyard!
In the process of inverting our library, we hopefully mill a few Narcomoebas and Bridges. Our next step is to immediately flashback another Dread Return, this time targeting Flayer of the Hatebound. At this point, we should have Flayer and a horde of the undead thanks to Bridge from Below. While burning our opponent whenever we recur an Ichorid or Nether Shadow is great, we use our last Dread Return to reanimate a Golgari Grave-Troll. This will hit our opponent for far more than the required 20 damage to kill our opponent.
While we are performing the combo, it is crucial that the opponent cannot interact with us. Once we reanimate Balustrade Spy, we either have to kill our opponent or lose to decking ourselves. Sacrificing the Spy to Cabal Therapy will clear the way for a win, assuming we name correctly. At this stage of the game, I would name Force of Will or Daze against a blue deck and Swords to Plowshares against white-based strategies. Some Dragon Strategies use Faerie Macabre, and remember that if they let you name a card they cannot respond. Once we know the coast is clear, we can finish off our opponent. If we have Cabal Therapies in the bin before casting Dread Return, I would cast them before attempting the combo due to how fragile it is. If they counter the last Dread Return for Golgari Grave-Troll, we can still attempt to win on our upkeep by putting as many Ichorids and Nether Shadows into play as possible. Keep in mind, however, that Spy is not dredging—we cannot put the cards in our graveyard in any order, they must remain in the order they are milled in.
The Sideboard
Sideboarding with Manaless Dredge is difficult, to put it lightly. All of our spells have to be free, and it is very difficult to sideboard lands into the deck unless we remove the Balustrade Spy combo. As such, the cards here are dedicated to beating cards that we have no answer to.
- The last Chancellor of the Annex makes its home here. The aforementioned all-in combo decks of Oops and Belcher are thrown off their game by this, and other combo strategies such as ANT—Ad Nauseaum Tendrils, the premier Storm deck of the format—lose some of their speed thanks to Chancellor.
- A playset of Contagion are for decks with disruptive creatures or otherwise must-answer small threats. A first turn Deathrite Shaman spells disaster for us, and despite the fact that it Time Walks us, the alternative of losing the game is far worse. Theoretically, we could bring it in against Delver of Secrets strategies, but they also run a myriad of counterspells that make Contagion a literal Time Walk. The card is fine against Elves, but keep in mind that if it is not in the opening hand we will either never draw it or hope we get lucky by refusing to dredge.
- In a similar vein, a pair of Sickening Shoal can also answer the largest creatures in the format along with the usual suspects Contagion hits. Griselbrand, Reality Smasher, and other giant creatures are difficult for us to beat. The number of Shoals and Contagions we play is flexible, and we can play more Shoals over Contagions if we so choose.
- Four copies of Faerie Macabre allows us to attack the graveyard. It is some of the only free graveyard hate that does not require being cast, so it gets around tax effects like Thalia, Guardian of Thraben. Precision graveyard hate is excellent against Reanimator and opposing Dredge strategies, and we can always feed the Faeries to Ichorid when we dredge them.
- A playset of Mindbreak Trap is our gameplan against Storm decks and other strategies that want to cast as many spells as possible in a single turn. These include, but are not limited to: ANT; TES, otherwise known as The Epic Storm; Belcher variants; and Oops All Spells. Unfortunately, we sometimes need to mulligan into these, which means every time we do not find them we functionally skip a turn. This is one of the deck's greatest weaknesses. Clutch sideboard cards that we must have to win a matchup are difficult to find in the deck because we have no draw power. If we must have them, we can try mulliganing, but it may be better to accept not having them and keep the seven.
This is the manifestation of supreme evil. Just looking at it burns my eyes.
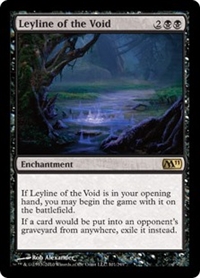
Looking at the sideboard, one aspect of the deck becomes very obvious: we cannot beat certain types of graveyard hate. A turn zero Leyline of the Void or a Rest in Peace are auto-losses for us. However, we can still play through many of the hosers in Legacy. Tormod's Crypt, Deathrite Shaman, Faerie Macabre, and many others are annoying and can temporarily halt our offensive. While many Dredge players choose to play zero answers to these hate cards—a playstyle sometimes referred to as "Fearless Dredge"—there are ways to incorporate these effects into the sideboard if you so choose. Five-color lands, such as City of Brass and Mana Confluence, can be paired with Nature's Claim and Fragmentize to form a potent anti-hate package. It does, however, require dedicating all 15 slots to these cards, and requires a certain set up to work properly. In other Dredge strategies with lands, it is easier to include artifact and enchantment removal. In Manaless Dredge, it is significantly harder to pull off, and as such I recommend accepting the loss to Leyline and Rest in Peace.
Upgrades and Adjustments
Manaless Dredge is inexpensive naturally. What is presented here is a complete maindeck with a few sideboard adjustments. Many lists play Leyline of Sanctity instead of Mindbreak Trap to beat Storm decks. Additionally, playsets of Force of Will are becoming increasingly more popular in sideboard. Elesh Norn, Grand Cenobite is also popular alongside Iona, Shield of Emeria. Some players, but not all, include Lion's Eye Diamond, and while it is expensive, many players simply do not play it in favor of other cards. For adjustments, the amount of slots dedicated to the combo is quite flexible, and a few players even opt to remove it entirely in favor of more dredgers and flexible answers. There are other viable maindeck Dread Return targets, such as the aforementioned Elesh Norn and Iona, and the others are just plain funny to see like Whirlpool Rider, which gives us free dredges! For the old school Dredge players, Flame-Kin Zealot pops up occasionally. I have seen some lists that cut the Balustrade Spy combo, instead playing a few copies of Dakmor Salvage to pay for tax effects and make Daze much more manageable.
To recap all of the layers of Dredge, along with adding some tips and tricks:
- When we dredge, we decide what order the cards enter the graveyard. Use this to stack the bin for Nether Shadow.
- Always choose to be on the draw in Manaless Dredge.
- Never mulligan in Manaless Dredge unless you are looking for a specific sideboard card.
- While it is true that playing specific printings of cards to make them easier to see in the graveyard, it is also excellent for learning how to play the deck and what to look for. I strongly recommend following my suggestions on printings or trying it on Magic Online first. It works wonders for learning the deck.
- Sometimes it is easier to keep the deck in the center of the play area, with the graveyard on one side and the battlefield on the other. This gives us more room for our graveyard and makes open information easier to spot.
- Whenever a non-token creature dies and goes to the graveyard, check for Bridge from Below triggers.
- If we win game one, we will be on the play for the second game. Our opponent will chose this because we cannot do anything on the play, so they functionally get a free draw step.
- Remember that our sideboard cards that require discarding cards are giving away a turn if we cast them on our first turn.
That brings us to the end of this week's Treasure Cruisin'! While this one was quite lengthy, I think explaining the many intricacies of Manaless Dredge aids players unfamiliar with the archetype. What do you think of the deck? It certainly is one of my favorite decks to play in Legacy, and cheap too!
However, before I close, I do need to make an announcement. The goal of Treasure Cruisin' was to make budget decks every other week. Unfortunately, life is not making this easy. I simply do not have time to devote to a biweekly article series. As such, the schedule for Treasure Cruisin' will be moving to a monthly release. I love doing this, and I am not going anywhere anytime soon, but my schedule simply does not permit me to make these as common as I would like. I have a few Modern deck idea to brew with thanks to Ixalan's release, so expect some brews from me in the future! Until then, you can always PM me with deck ideas and questions, or post them in the comments.
-
View User Profile
-
Send Message
Posted Oct 25, 2017I'll try to build it as soon as possible as a budget way to get to play Legacy and try to get the money to invest in Grixis Delver or Canadian Threshold that are the two decks I'm also trying to build.
You article was inspiring!
-
View User Profile
-
Send Message
Posted Oct 12, 2017