Hello and welcome to this month's Treasure Cruisin'! Today, we are revisiting control in Modern, but going in a different direction than last month. Rather than being reactive, we're looking to be proactive in eliminating every threat in the early turns and then turning the corner on turn four or five, slamming must-answer threats onto the board. In this deck, every threat is capable of ending the game on its own, meaning any creature or planeswalker will run away with the game if left unchecked. This, backed by removal and Blood Moon, forms a strategy that either controls the game until the opponent is out of cards or can drop threats quickly and go on the beatdown against unsuspecting opponents. If you want a deck that can not only take over the game but turn the corner at the drop of a hat, you'll love Big Red. It has several cheaper upgrade options, and quite frankly is my favorite deck I've ever written about. Coming in at $200 USD, I present to you Modern Big Red!
| Modern Big RedMagic OnlineOCTGN2ApprenticeBuy These Cards | ||
|---|---|---|
|
Creatures 2 Glorybringer 4 Goblin Rabblemaster 3 Pia and Kiran Nalaar 3 Stormbreath Dragon Planeswalkers 2 Chandra, Flamecaller 2 Chandra, Pyromaster 3 Koth of the Hammer | Sorceries 3 Anger of the Gods 1 Roast 3 Tormenting Voice Instants 4 Lightning Bolt Enchantments 3 Blood Moon Artifacts 4 Mind Stone Lands 23 Mountain | Sideboard 2 Damping Sphere 3 Dragon's Claw 2 Pithing Needle 2 Ratchet Bomb 2 Roast 2 Shatterstorm 2 Tormod's Crypt |
Big Red is a complicated deck to play. You want to play impactful creatures to put your opponent on the backfoot whenever you can, but also keep in mind that you have cards that can win games on their own. As if this wasn't nuanced enough, these cards change in every matchup. For example, Blood Moon may not be strong against Death and Taxes, but Stormbreath Dragon sure is. While this is true with most decks in Modern due to the diversity of the format, Big Red takes this to a new level. This is because our threats generally require different types of answers. One game we dominate with dragons, the next is won off the backs of planeswalkers. This is part of what makes the deck so incredibly fun to play: There are so many ways to end the game. Add that all of our cards are capable of winning a game on their own and multiple threats get out of hand fast. Despite looking rather simplistic, I would not recommend Big Red to new players. The inherent complexity and difficulty to play leads to frustration to those who are not experienced Magic players. This deck is more aimed at players who have played the game for a while and looking to jump into Modern from different formats. Perhaps you've played casually for a few years and are looking to jump into Friday Night Magic, or maybe you're looking for a place to play some of the cards rotating out of Standard, which will be covered later. For now, let's cover the utility pieces of the deck before jumping into other core components.
Utility
A typical Big Red deck plays two things: Mana acceleration and prison pieces. This build is no different. We have a large mana curve that we need access to to win. Our mana rock of choice is Mind Stone. We need our acceleration early for it to be relevant in later turns, so at two mana it sits at a perfect spot on the curve. The issue with playing mana rocks, however, is they are dead draws late. Mind Stone circumvents this by sacrificing to draw a card when we don't need the mana. It is a very straight forward inclusion: we want to play our cards faster while not drawing dead in the late game. While three mana can be a big investment for cycling, especially when two of it has to be on our turn, it's better than being stuck with the card if we don't need it.
Mind Stone alone will not keep us from drawing poorly. If we're looking to draw cards, red does not offer much in the way of card advantage. Ultimately, I believe Tormenting Voice to be the best option. Essentially, we turn our dead cards into something new for two mana. While this is nothing spectacular, it give us more chances to find cards that are relevant with the current gamestate. While we have to discard to cast this, we are discarding chaff that wasn't going to help us win anyway. Being at sorcery-speed is not ideal, but because we're mono red we have to take what we can get. While we do need to keep a card in our hand if we want to cast this, holding excess lands is an easy way to get around this problem. Overall, Tormenting Voice gives us increased consistency with very little downside, and it's low mana cost makes it great for our deck.
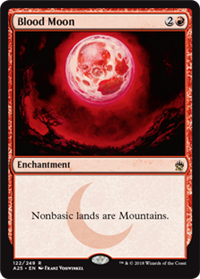
You are not responsible for
your opponents' fun.
Our last card is my favorite card in all of Magic: Blood Moon. This three mana enchantment is capable of winning games on its own. Three color midrange and control decks, Humans, even Burn all can lose instantly from a resolved Blood Moon. Obviously, our opponents will play around it if they suspect we have one, but some players will be caught off guard. For some decks, such as Tron, Scapeshift, and Ad Nauseam, Blood Moon won't win the game on the spot but it will slow them down long enough for us to get ahead. Keep in mind that this card will not be an instant win every time you play it, nor will it be a great card in every matchup. Do not expect to win games just because you resolved this card. While your opponent may be crippled, they aren't out of the game. Tron can still get to seven lands and slam Karn and run away with the game. Burn can still cast their mono red spells, and some decks will just find their basics and slowly play spells again. Blood Moon is just too strong for us to not run, and the ability to steal games or slow down the opponent far outweighs its potential to whiff.
Removal
In order to kill our opponent, we have to clear the way for our creatures. We play spot removal and a few sweepers to make short work of swarms of creatures. For spot removal, we play four Lightning Bolts and a single Roast. We need a one mana instant that kills most creatures in the format, and Bolt is one of the best red cards ever printed. We can use it to finish off our opponent or kill a planeswalker: There is no reason not to run the full four copies. Roast is a card that has a more specialized purpose. In a format with Tarmogoyf, Gurmag Angler, and turn two Thought-Knot Seers, being able to kill large creatures early is a big perk. At two mana, it falls right on curve with Tarmogoyf, and is also castable when large creatures hit the board later. The major downsides are it cannot target flying creatures and it is a sorcery. The most popular creature we simply can't deal with is Celestial Colonnade, a major player in the rising Jeskai and UW Control decks. However, we pack other ways to kill creatures that are attached to our threats that will be covered in their respective categories. Roast is good card to have as a one-of, and I could see playing more copies should one wish to.
Our board wipe of choice is Anger of the Gods. Three mana is a great spot for a sweeper against aggro decks and other decks that want to flood the board with creatures early, such as Counters Company. Three damage will kill every creature in most aggro and creature-based combo decks. The major exceptions are Affinity, which can dodge the wrath altogether with Arcbond Ravager, and any deck playing Selfless Spirit. The upside of exiling any creature that dies the turn Anger is cast gives us an edge against decks that have graveyard synergies, such as Tarmogoyf and Eternal Witness decks, or hose graveyard-based creature decks like Dredge and Hollow One. Additionally, very few of our creatures actually die to Anger's damage, meaning it can be one-sided board wipe against most decks. Be sure to time your Angers correctly. Too soon and you leave your opponent with enough creatures in hand to climb back into the game; too late and you don't give yourself enough time to recover.
Creatures
Our creatures need to be capable of finishing the game on their own. If we can keep it alive, any one creature in our deck can be our sole threat that wins the game. While this is unlikely to happen, multiple threats with this trait can be too much to handle, crushing our opponent under giant large creatures. Goblin Rabblemaster, while not being large initially, can bring an army of tokens with it if left unchecked. In fact, Rabblemaster represents over 23 damage in four turns if none of its cohort die. If we can't attack with Rabblemaster for fear of it trading in combat, the tokens add up if they aren't killed. It is also excellent for forcing blocks. We may find ourselves in situations where we swing in with Rabblemaster and a few goblins in to prompt a block to kill Rabblemaster, leaving one less creature on the board for us to deal with later. It represents a lot of damage in such a short time that our opponent must have a plan against it or be smashed under a horde of rampaging goblins.
Our next creature also brings a few other creatures with them. Pia and Kiran Nalaar is an absolute powerhouse. The two Thopters they bring are very useful for chump blocks or simply trading with X/1's, and many times we can swing freely with them due to the lack of fliers in the format. However, P&K do a lot more than just just bring some fliers to the party. Their ability to sacrifice artifacts to deal damage mucks up combat math. We can pair them with other creatures to force blocks that not only cost us very little but also make our artifacts trade up with our opponent's creatures. They can also be used to force the final few points of damage through to our opponent or their planeswalkers. Even if our opponent spends a removal spell on P&K themselves, we still have Thopters lying around. Turning a redundant Mind Stone into a Shock can be what we need to close our a game, and giving us another use for a mana rock. Due to their legendary status, we only play three, but we're never going to be upset to see one on our draw step.
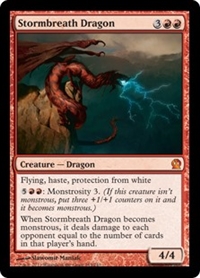
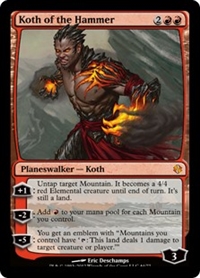
The best planeswalker in the format
vs. one scaly boi.
Our last creatures are a pair of dragons: Standard all-star Glorybringer and the resilient Stormbreath Dragon. Glorybringer is able to bring the beats while also removing a problematic creature when we need it to. A 4/4 flying haste beatstick is incredibly difficult to beat in Modern, but adding the ability to kill our opponent's only blocker or biggest threat and we're looking at one of our best late game plays. Exerting Glorybringer is something we don't mind doing, especially if it means staying alive and thinning our opponent's forces. Due to its converted mana cost and toughness, our opponent eeds Path to Exile or a wrath to remove this. Stormbreath Dragon is much more focused on beating down while being impossible to get rid of. Protection from white makes it immune to Path to Exile and Celestial Colonnade, the two most common ways of dealing with large fliers. It also dodges Teferi, Hero of Dominaria and is able to block white creatures with ease. While it still goes down to Wrath of God effects, it is so incredibly difficult to deal with that a resolved Stormbreath may win the game against any white based strategy. Its monstrous ability is excellent for closing out games and not difficult to reach, often dealing 10 damage between the damage inflicted on resolution and the subsequent attack. If we want to win the game in blaze of fire, these two dragons get the job done and fast.
Planeswalkers
Some people get angry enough to punch a wall.
This man gets angry enough to punch you with a wall.
One of Big Red's biggest hurdles is consistency. We have very few ways to draw cards and red isn't a color that gets many utility cards. Planeswalkers fill a variety of roles because of their multiple abilities. For this deck, we want our planeswalkers to be threats first and foremost, and then either play as removal or draw cards. In terms of pure beats, it doesn't get more direct than Koth of the Hammer. Koth turns one of our Mountains into a 4/4 attacker for one turn. While this does open ourselves up to Fatal Push, we play enough lands and Mind Stones for it not hurt us too much. We can also simply untap the land to hold up one mana on our opponent's turn. If we need acceleration, Koth's minus ability adds more mana than you can shake a stick at, allowing us to play multiple cards in one dramatic turn. The best part about Koth, however, is his ultimate. He reaches it in two turns, and many players simply do not expect him to drop an emblem that fast. When we cast Koth, we can reasonably expect to ultimate him and take over the game. Turning every land in our deck into a pinger ensures that we'll run away with the game. We can shut down every creature our opponent plays, and simply leave all of our lands untapped until our opponent's end step, where we burn them before untapping on our turn. Additionally, Koth's emblem gives us a way to beat infinite life gain from decks comboing with Kitchen Finks: If our opponent can't keep a creature on the board, they cannot deal damage to us. Thus, they deck out before we do because they pay cards like fetchlands, Chord of Calling, and Collected Company, all cards that thin their deck. We only play three because redundant copies are pretty rough and it cuts down on the four drops,the heaviest spot on our curve. Koth may be on of the most powerful win conditions in our deck.
Our next planeswalker doesn't apply pressure to the board, but does generate card advantage. Chandra, Pyromaster is much better at controlling the game than turning the corner. She eliminates any creature with one toughness, or at worst case makes the creature unable to block. Notably, she targets the opponent, not the creature, so a creature with hexproof can still take damage from her. However, we're mainly using her zero ability. Being able to see an extra card every turn is great in a deck that tends to be clunky. She smooths out our draws late, when we may need specific answers to push through our opponent's defenses. Notably, the rules text says we play the card, not "cast." This is an important distinction to make because we can play lands off of her, which leads to us having more cards in hand for our opponent to worry about. We're never using her ultimate because it isn't what we want to be doing in this deck. We only run a pair to cut down on four mana cards, and she isn't as impactful as Koth, but she is an important inclusion in the deck for her utility.
Our last planeswalker is our curve topper of choice, Chandra, Flamecaller. Six mana is incredibly expensive in Modern, and if anyone is paying that much for a spell it better win them the game. Thankfully, Chandra does just that! Two 3/1 creatures to beatdown with presents a fast clock. Her zero ability is rarely used, but if we have a hand full of lands it can get at east replace it with some spells. Her minus X ability is more often used, wiping the board clean for her elementals to swing into. She represents an overwhelming amount of damage, making it difficult to lose once we resolve her. We play two due to her high mana cost, but between mana rock and Koth we should be able to get her out before turn six. If we need a way to close out the game or draw out of a tough situation, big Chandra is the answer.
Manabase
Koth wants as many lands as possible to be Mountains for his abilities, and any nonbasics would turn into Mountains thanks to Blood Moon, so we're just running 23 basic Mountains. While there is a case for a copy or two of Valakut, the Molten Pinnacle, running all basics is the cheapest and simplest answer, and it allows us to cast all our spells on curve.
Sideboard
Sideboards are metagame-dependent. This means that, while what I've listed it a great starting point, it should be adjusted for the decks you expect to play against. However, I would always include combo hate cards in the form of disruption. If you ever cut Goblin Rabblemaster, put a few copies in the sideboard. It is absolutely necessary to have a fast clock in 75 to beat combo and Tron. My recommended starting point:- Two Damping Spheres for Storm, Eggs, Tron, and other decks that want to abuse lands or cast several spells in one turn
- A trio of Dragon's Claw to shore up the Burn matchup, along with the popular FNM deck, Goblins.
- A pair of Pithing Needle to deal with troublesome activated abilities, such as Lightning Storm out of Ad Nauseam, Expedition Map and Karn, Liberated from Tron, Walking Ballista from Counters Company, and many more.
- Two copies of Ratchet Bomb as utility removal. Red has no way to interact with enchantments and planeswalkers outside of burn where applicable, so this gives us a way to fight them. It can also be used as a board wipe against aggro decks because they tend to run a small creature curve.
- Two Roasts as spot removal for large creatures. Bring these in against Eldrazi Tron, Jund, and creature-based combo decks like Counter Company.
- A pair of Shatterstorm for Affinity, Eggs, and other artifact-based decks.
- Two copies of Tormod's Crypt to hate Dredge, Grishaolbrand, and Reanimator decks.
Upgrades and Adjustments
Big Red is viable as presented here, but there is certainly room to grow. There are a few minor changes you can make to the deck, but they are more metegame decisions than honest upgrades. Abrade is an extremely potent spell owe could play for maindeck artifact hate and removal. We could go heavier on the manarocks, playing Guardian Idol and running a much higher curve. Other changes would require a larger budget. Wurmcoil Engine is an utter powerhouse that you don't want to stare down. Similarly, Batterskull is an excellent inclusion as well. There's also heading in the direction towards more dragons with Sarkhan, Fireblood, and with the recent victory of Skred Dragons at the StarCityGames Modern Open in Philadelphia, a Big Red Dragons deck could honestly exist somewhere in Modern.
There are plenty of directions you can take this deck is you want to add more money later. If you already have them from Standard, Chandra, Torch of Defiance should absolutely replace Pyromaster. Hazoret, the Fervant could also be played in this, although it may require shifting the curve away from six drops. If you want to upgrade into a different deck, the two options that spring to mind are Skred Red and All-In Red. Skred Red would require rebuying the entire manabase for Snow-Covered Mountains and Scrying Sheets, along with the namesake Skred. After this, you only need Sarkhan, Fireblood, and you have Skred Dragons. If you wanted to build more traditional Skred, you have more options, but the core of the deck is much the same as what's listed here. All-In Red is a much different deck, choosing to go deep on prison effects. Simian Spirit Guide, Desperate Ritual, and Pyretic Ritual allow you to cast Blood Moon, Magus of the Moon, Chalice of the Void, and Ensnaring Bridge, or just kill your opponent with Goblin Rabblemaster and Scab-Clan Berserker.
If you love shutting down your opponent, and making sure that they never get to play Magic, then I strongly encourage you to build this deck. It is so much fun, I Big Red/Red Prison is my favorite archetype in all of Magic, I can assure you that you will love every minute you're playing this deck.
That concludes July's Treasure Cruisin'! What did you think of Big Red? I personally love this deck. It's easily my favorite deck that I've ever written about and worked on for Treasure Cruisin'. The deck is potent enough for the pilot to enjoy success at FNM if they are willing to learn how to play it. It has a ton of upgrade options and gives a home for your red cards that rotate out of Standard in a couple of months. If there's a deck you want to see on here, or you have comments or questions, you can ask them in the comments below or tweet at me, @CavalryWolfPack. Until next time, keep on cruisin'!
-
View User Profile
-
Send Message
Posted Jun 28, 2021-
View User Profile
-
Send Message
Posted Sep 4, 2018-
View User Profile
-
Send Message
Posted Aug 6, 2018-
View User Profile
-
Send Message
Posted Aug 7, 2018-
View User Profile
-
Send Message
Posted Aug 8, 2018By the way, I've been wondering, isn't it Calgary Wolf Pack? (Funny story, I know a guy who used to play for them who also plays Magic. His favorite card is...Lantern Kami. Seems a bit vanilla, but okay.)
-
View User Profile
-
Send Message
Posted Aug 8, 2018