Introduction:
It's that time again! Back to the Super-Budget-Super-Series segment of Squandered Resources, Part Two. If you weren't with us last week, this means that this a second course in my series on decks costing no more than $100, with some deliciously closer to $50. If this sounds tasty to you, go ahead and visit Part One--but they don't have to go in order, so you might as well start here! Onward, to this week's lists!
The Decks:
Deck Name: Aura Combo
Deck Type: Combo
Cost: $35
First for this week is a combo deck... so obviously I love it. The deck is called Aura Combo and it's pretty cool.
| Aura ComboMagic OnlineOCTGN2ApprenticeBuy These Cards | ||
|---|---|---|
|
Creatures-13 4 Academy Researchers 4 Invisible Stalker 4 Slippery Bogle 1 Iridescent Drake | Other Spells-28 4 Arcanum Wings 4 Eldrazi Conscription 4 Mythic Proportions 4 Ponder 4 Preordain 4 Spell Pierce 2 Dismember 2 Vapor Snag | Lands-19 19 Island |
Key Interactions-
Academy Researchers + Eldrazi Conscription or Mythic Proportions
Academy Researchers + Vapor Snag
Arcanum Wings + Slippery Bogle or Invisible Stalker + Eldrazi Conscription or Mythic Proportions
This mono-blue combo deck works in a similar way to the Sneaky Show decks that have had the spotlight in Legacy recently. That is, get a very large creature that is hard to answer, and use it to beat your opponent to death in two or three turns. However, unlike Sneaky Show this deck does not cheat large creatures into play. Instead, the goal is to cheat a large buff onto a hard-to-kill creature. The quickest and easiest way is to cast Academy Researchers with Eldrazi Conscription or Mythic Proportions in your hand; and then send one of them into play with him. Either one makes him a sizable threat, and it only costs you three mana to cast him. Note that while it is in there mainly for defense against enemy creatures, Vapor Snag can be used on your own Academy Researchers in a situation where he would otherwise die. This allows you to re-use him should you have another Aura in hand.

As I mentioned before, Vapor Snag is there to bounce threats that give you a hard time, and keep them away just long enough for you to produce threats of your own. While it can hurt to cast, Dismember is a permanent means of dealing with threats or hate bears. Should your Researchers get their bums removed, or should you get hit by a discard spell, Iridescent Drake allows you to grab an aura from your graveyard. Ponder and Preordain help you find your combo pieces and maintain consistency while Spell Pierce keeps you safe from discard and counter spells.
Aura Combo is certainly one of the strongest decks I will be presenting, and, at $35, it is also one of the cheapest. You really have nothing to lose by putting this baby together. A friend of mine who is new to Magic recently finished an Underground Sea tournament, piloting this deck to an even finish of two wins and two losses. It may not sound too impressive, but when you look at the price of this deck versus the price of his opponent's decks, plus the fact that he is a relatively new player, the deck's power shines through. He was one win away from making top eight with a $35 dollar deck in a tournament filled with top tier competitors. That has to say something.
Deck Name: Boo Berry
Deck Type: Combo
Cost: $40-$55
This next combo deck has two iterations, both stemming from the relatively unknown Legacy deck known as Cephalid Breakfast. Eat up!
| Boo Berry Version 1Magic OnlineOCTGN2ApprenticeBuy These Cards | ||
|---|---|---|
|
Creatures-16 4 Cephalid Illusionist 4 Vedalken Aethermage 3 Narcomoeba 2 Trinket Mage 1 Angel of Glory's Rise 1 Azami, Lady of Scrolls 1 Laboratory Maniac | Other Spells-22 4 Careful Study 4 Daze 4 Shuko 4 Dispel 4 Brainstorm 1 Spell Pierce 1 Dread Return | Lands-22 22 Island |
Key Interactions-
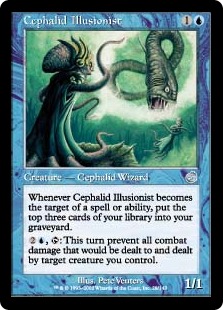
Cephalid Illusionist + Shuko
Vedalken Aethermage + Cephalid Illusionist
Trinket Mage + Shuko
Narcomoeba + Dread Return
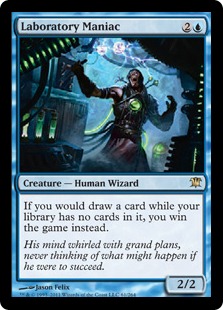
Dread Return + Angel of Glory's Rise and Azami Lady of Scrolls and Laboratory Maniac
The first version of the deck costs around $40 and, giving credit where credit is due, was shown to me by MTGSalvation user Stille_Nacht. His list works by abusing the zero-cost equip of Shuko and the trigger that occurs whenever you target Cephalid Illusionist. By using the equip ability of Shuko over and over again on Cephalid Illusionist, you are able to mill your whole deck into the graveyard. Doing so results in all of your Narcomoeba hitting the field. Each Narcomoeba can then be used as fuel for your Dread Return, which was just milled into the graveyard. What does Dread Return target? Why, Angel of Glory's Rise, of course! Bringing this hot mama onto the battlefield results in Azami Lady of Scrolls and Laboratory Maniac also coming into play, as well as all of your
The rest of the deck is built to make sure you can both find the combo and protect it. Careful Study and Brainstorm can dig cards from your deck and toss a cards from your hand. The latter becomes necessary when you get stuck with a key piece of the combo in hand, like Angel of Glory's Rise; when this happens, you can't finish your kill should you combo out.
Vedalken Aethermage serves as a tutor for your Cephalid Illusionist that is uncounterable. Is it Shuko that you are looking for? Have no fear, because you have a good-old fashioned wizard in your deck; Trinket Mage waves his magic wand, and Shuko appears. And because Trinket Mage is a wizard, Vedalken Aethermage is able to find him. Each of these critters can also be sacrificed to cast Dread Return should the need arise.
In addition, Daze, Dispel, and Spell Pierce give you protection from anything that may stop this combo from happening. Whether it be opposing counterspells, discard or something else, this countermagic suite should serve you well.
The next version of the deck works a little differently and costs a little more, but in my opinion, the extra cost gives you an extra boost.
| Boo Berry Version 2Magic OnlineOCTGN2ApprenticeBuy These Cards | ||
|---|---|---|
|
Creatures-10 4 Aphetto Alchemist 3 Narcomoeba 1 Angel of Glory's Rise 1 Azami, Lady of Scrolls 1 Laboratory Maniac | Other Spells-32 4 Basalt Monolith 4 Careful Study 4 Dispel 4 Fabricate 4 Mesmeric Orb 4 Ponder 4 Preordain 2 Cabal Therapy 1 Spell Pierce 1 Dread Return | Lands-18 14 Island 4 Crystal Vein |
Key Interactions-
Aphetto Alchemist or Basalt Monolith + Mesmeric Orb
Fabricate + Basalt Monolith or Mesmeric Orb
Narcomoeba + Dread Return
Dread Return + Angel of Glory's Rise and Azami Lady of Scrolls and Laboratory Maniac
This version of Boo Berry mills itself not through Cephalid Illusionist and Shuko, but through the interactions you get from tapping and untapping either Aphetto Alchemist or Basalt Monolith infinite amounts of times with Mesmeric Orb on the field. Simply resolve either of the two tappers and the Orb and mill away. Aphetto Alchemist can target himself with his own ability, and the mana obtained through tapping Basalt Monolith can be used to untap it as well. From here the deck performs identically to its cousin version. Mill the jellyfish, use them to cast Dread Return, and kill your opponent with an angel, a wizard, and a scientist who likely had mommy issues.
In Boo Berry 2, Fabricate is one of your strongest searches, as it finds both Basalt Monolith and Mesmeric Orb (whichever you need at the time). Your eight cantrips of Ponder and Preordain also aid in the search.
Cabal Therapy protects the combo along with Dispel and Spell Pierce, but that's not its only purpose. As mentioned in the explanation of Boo Berry 1, a key combo piece like Angel of Glory's Rise being
Because this version of the deck is more artifact-based, you have to worry much less about creature removal hindering your performance. This also allows Crystal Vein to be played as a sort of accelerator to the combo. You don't need lands to kill your opponent, so sacrificing Vein should have little or no drawbacks when you use it to cast the last piece of your combo.
Both versions of Boo Berry are deadly in their own right. As combo decks they come with the surprise factor that makes combo decks inherently strong; but beyond this, you get to win using Laboratory Maniac. Seriously, what's not to like?
Deck Name: Aggro Elves
Deck Type: Aggro
Cost: $80
Moving away from combos, if only for a little bit, we have another very popular tribe in Magic to present. Elves!
| Aggro ElvesMagic OnlineOCTGN2ApprenticeBuy These Cards | |
|---|---|
|
Creatures-38 4 Bramblewood Paragon 4 Elvish Archdruid 4 Elvish Champion 4 Ezuri, Renegade Leader 4 Fyndhorn Elves 4 Imperious Perfect 4 Joraga Warcaller 4 Llanowar Elves 4 Skyshroud Elite 2 Viridian Zealot | Other Spells-4 4 Lead the Stampede Lands-18 18 Forest |
Key Interactions-
Bramblewood Paragon + Joraga Warcaller
There is not a lot to say for this deck as far as key interactions go; most of its cards just build off each other. The one exception to this is the interaction you get when you combine Bramblewood Paragon and Joraga Warcaller. Joraga Warcaller is a Warrior. This means that if Bramblewood Paragon is on the field at the time you cast your Warcaller, he comes into play with a free kicker paid. Add in your own kickers and things get out of hand very fast. With Bramblewood Paragon himself pumping half of the creatures you cast, plus Joraga Warcaller, Elvish Archdruid, Elvish Champion, and Imperious Perfect pumping everything, your elves get very big very fast.
But what's the use if you don't have a lot of them? Llanowar Elves and Fyndhorn Elves both act to accelerate your mana, increasing the number of elves played per turn. Meanwhile, Lead the Stampede ensures you a constant supply of playable pointy-ears. Skyshroud Elite will almost

If I were to make any changes, I may take out Skyshroud Elite and replace it with Arbor Elf, which would call your elves to battle even faster. Skyshroud Elite serves as a beat-stick, sure, but when you have three lords on the field, everything becomes a beat-stick, so he kind of loses his appeal. Whether it started out that way or not doesn't really matter in the end. This change might make the deck faster and more streamlined, but it would require testing.
Deck Name: Green Urza-Tron
Deck Type: Combo
Cost: $85
Staying green but back to combos, it's Urza-Tron!
| Green Urza-TronMagic OnlineOCTGN2ApprenticeBuy These Cards | ||
|---|---|---|
|
Creatures-17 4 Overgrown Battlement 4 Wall of Blossoms 4 Wall of Roots 1 Platinum Angel 1 Sundering Titan 1 Ulamog, the Infinite Gyre 1 Emrakul, the Aeons Torn 1 It That Betrays | Other Spells-19 4 Ancient Stirrings 4 Sylvan Scrying 4 Crop Rotation 3 Moment's Peace 2 Beast Within 2 Fog | Lands-24 11 Forest 4 Urza's Mine 4 Urza's Power Plant 4 Urza's Tower 1 Eye of Ugin |
Key Interactions-
Urza's Mine + Urza's Power Plant + Urza's Tower
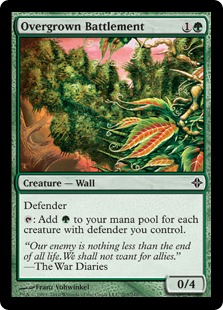
Overgrown Battlement + Wall of Blossoms or Wall of Roots
Ancient Stirrings + Fatty or Land Cards
Sylvan Scrying or Crop Rotation + Urza's Mine or Urza's Power Plant or Urza's Tower or Eye of Ugin
The strategy of Green Urza-tron is simple. Generate as much mana as possible as fast as possible, and then use it to hard-cast a fatty. Mana generation is key to this strategy; enter Urza's Mine, Urza's Power Plant, andUrza's Tower. Having just one of each of these gives you a whopping seven mana to use as you please. Add in additional Forests or copies of the Urza lands, and you'll have enough mana to cast a Charizard if you so please. Of course, you can't just hope to top-deck each of the Urza-tron lands one by one. That's about as realistic as casting a Charizard (although granted, if you could do either of these, you've probably got the game in the bag). This is where Sylvan Scrying and Crop Rotation come into play. Of these, Crop Rotation has an additional use: because you can sacrifice the land used to cast it, you can toss your extra copies of Urza lands and replace them with that one combo piece you are missing. Ancient Stirrings is not only a good land-searcher, but it also serves as a fatty-finder. Speaking of fatty-finder friends, Eye of Ugin can be searched up as a land through any of these methods--and then you can use it as your go-to guy for grabbing a fatty every turn.
The second method that Green Urza-tron uses to generate absurd amounts of mana is actually not a method at all... it's a Wall. An Overgrown Battlement, to be exact. Every creature in this deck that is not a win-condition is a wall. The deck
To add to the whole not-dying-while-you-make-land-drops plan, both Fog and Moment's Peace have been included. Sometimes this deck really doesn't need to do anything on its turn except play a land, building up to that key turn where it explodes. Fog and Moment's Peace help you do this without fear of dying as a result. The former was included because of its low mana cost, while the latter was chosen for its ability to be cast multiple times. Should a problem creature or permanent pop up that Fog is unable to stop, then you can bring out Beast Within to deal with it. Believe me, your creatures will be bigger than the beast that results from it. The inclusion of these cards, along with all of the walls, should give you plenty of breathing room to play your lands and fatties.
Green Urza-tron is different from most combo decks that try to win by turn three or four, but what it lacks in speed, it makes up for in consistency and inevitability. Your opponent cannot counter lands, much less Emrakul. This is a great deck for anyone who likes making tons of mana and casting huge monsters--on a budget. It's like dropping a Charizard on the table when you play Magic, only whithout the whole judge being called when you set your opponents cards on fire thing...
Deck Name: Mono-White Control
Deck Type: Control
Cost: $100
The final deck in this week's article is our first foray into white. It hasn't got a fancy name, but, like wrestler The Rock, it's really too boss to need one.
| Mono-White ControlMagic OnlineOCTGN2ApprenticeBuy These Cards | |
|---|---|
|
Other Spells-36 4 Day of Judgment 4 Island Sanctuary 4 Silence 4 Swords to Plowshares 3 Oblivion Ring 3 Isochron Scepter 2 Dawn Charm 2 Disenchant 2 Humility 2 Luminarch Ascension 2 Path to Exile 2 Sacred Mesa 1 Pulse of the Fields 1 Story Circle | Lands-24 23 Plains 1 Kjeldoran Outpost |
Key Interactions-
Isochron Scepter + Silence or Swords to Plowshares or Disenchant or Dawn Charm or Path to Exile
Island Sanctuary + Sacred Mesa or Luminarch Ascension or Kjeldoran Outpost
Humility + Sacred Mesa or Kjeldoran Outpost
As hinted by its name, this is a control deck. If you like long, drawn-out games. then this deck is for you. Mono-White Control's basic strategy is to keep your opponent from ever doing anything important on the field. This means using Swords to Plowshares, Path to Exile, Day of Judgment, Oblivion Ring, and Disenchant to get rid of anything and everything that pops up on their side.
The most powerful interactions in the deck stem from the card Isochron Scepter. Playing the Scepter and imprinting Silence can win you the game on the spot. By casting the imprinted Silence on each of your opponent's upkeeps, you effectively shut them out of playing the game. At the very least, it is a very annoying lock that can only be disrupted at instant speed with a counterspell or artifact destruction spell. Since most aggro players of today only play Qasali Pridemage as their answer to pesky artifacts, you can scratch that whole instant-speed-artifact-destruction thing off of your list in many of your games.
Silence is not the only thing you can imprint on the Scepter either. Swords to Plowshares and Path to Exile can both be stuck on to give yourself what is, in essence, a mini-gun with infinite ammo. Your opponent will find it very difficult to keep anything on the field once you get infinite removal spells. Disenchant can be thrown in as well, should you find yourself in a match-up where it's needed (examples are Affinity, Staxx, or really any archetype that relies heavily on artifacts or enchantments). In addition, Dawn Charm can ensure that you never take combat damage again. The charm can also be helpful against discard, burn, and many other types of spells that target you, making it one of the most versatile cards in the list.
Island Sanctuary serves as the deck's other lock. After resolving the Sanctuary-as well as at least one token producer, such as
Should no lock piece find its way to your hand, don't dispair; you can always cast the card that every judge hates: Humility. This bomb can and will stop many of the decks you face in their tracks. Qasali Pridemage no longer becomes a threat to your Scepters, Insectile Aberration becomes a 1/1 again, and anything that Sneaky-Show cheats into play becomes laughable. Humility also drastically increases the power of each of your token-generating cards. When every creature is on even playing field, you can trade creatures all day. Your opponent will run out eventually, but you never will.
Pulse of the Fields allows you to work against super aggressive strategies that don't use the field, like Burn or U/R Delver. Gaining four life every turn is nothing to scoff at, and can be just the thing you need to bring yourself up to snuff and set up a good wall. Story Circle is more or less the same thing, serving as a catch-all for whatever the opponent tries to throw at you.
The power of this deck comes from its ability to survive. All of the removal, board locks and disruption make it a difficult deck to play against. Many opponents will spend the whole game scrabbling to fight back. This, in combination with Mono-White Control's potential to stick a serious and game-ending threat as early as turn two, leaves anyone sitting across from you on their toes at all times.
Conclusion:
That's it for this week. As always, I would love to hear from you guys. What did you think of this week's lists? Do you have any budget decks that you would like to share with me? Please do! If you have not already read part one of this series, I suggest you check it out (that's FIVE more decks as cheap and useful as these ones). Next week we will be looking at a $35 combo deck that can kill on turn two, as well as some crazy critters known as Kithkins. Until then, save your pennies, and I'll put 'em to good use!
Comments